
Build a blue VK63 Speedmaster homage
Assemble a blue-and-white chronograph from a VK63 movement, dial, case, hands and rubber strap.
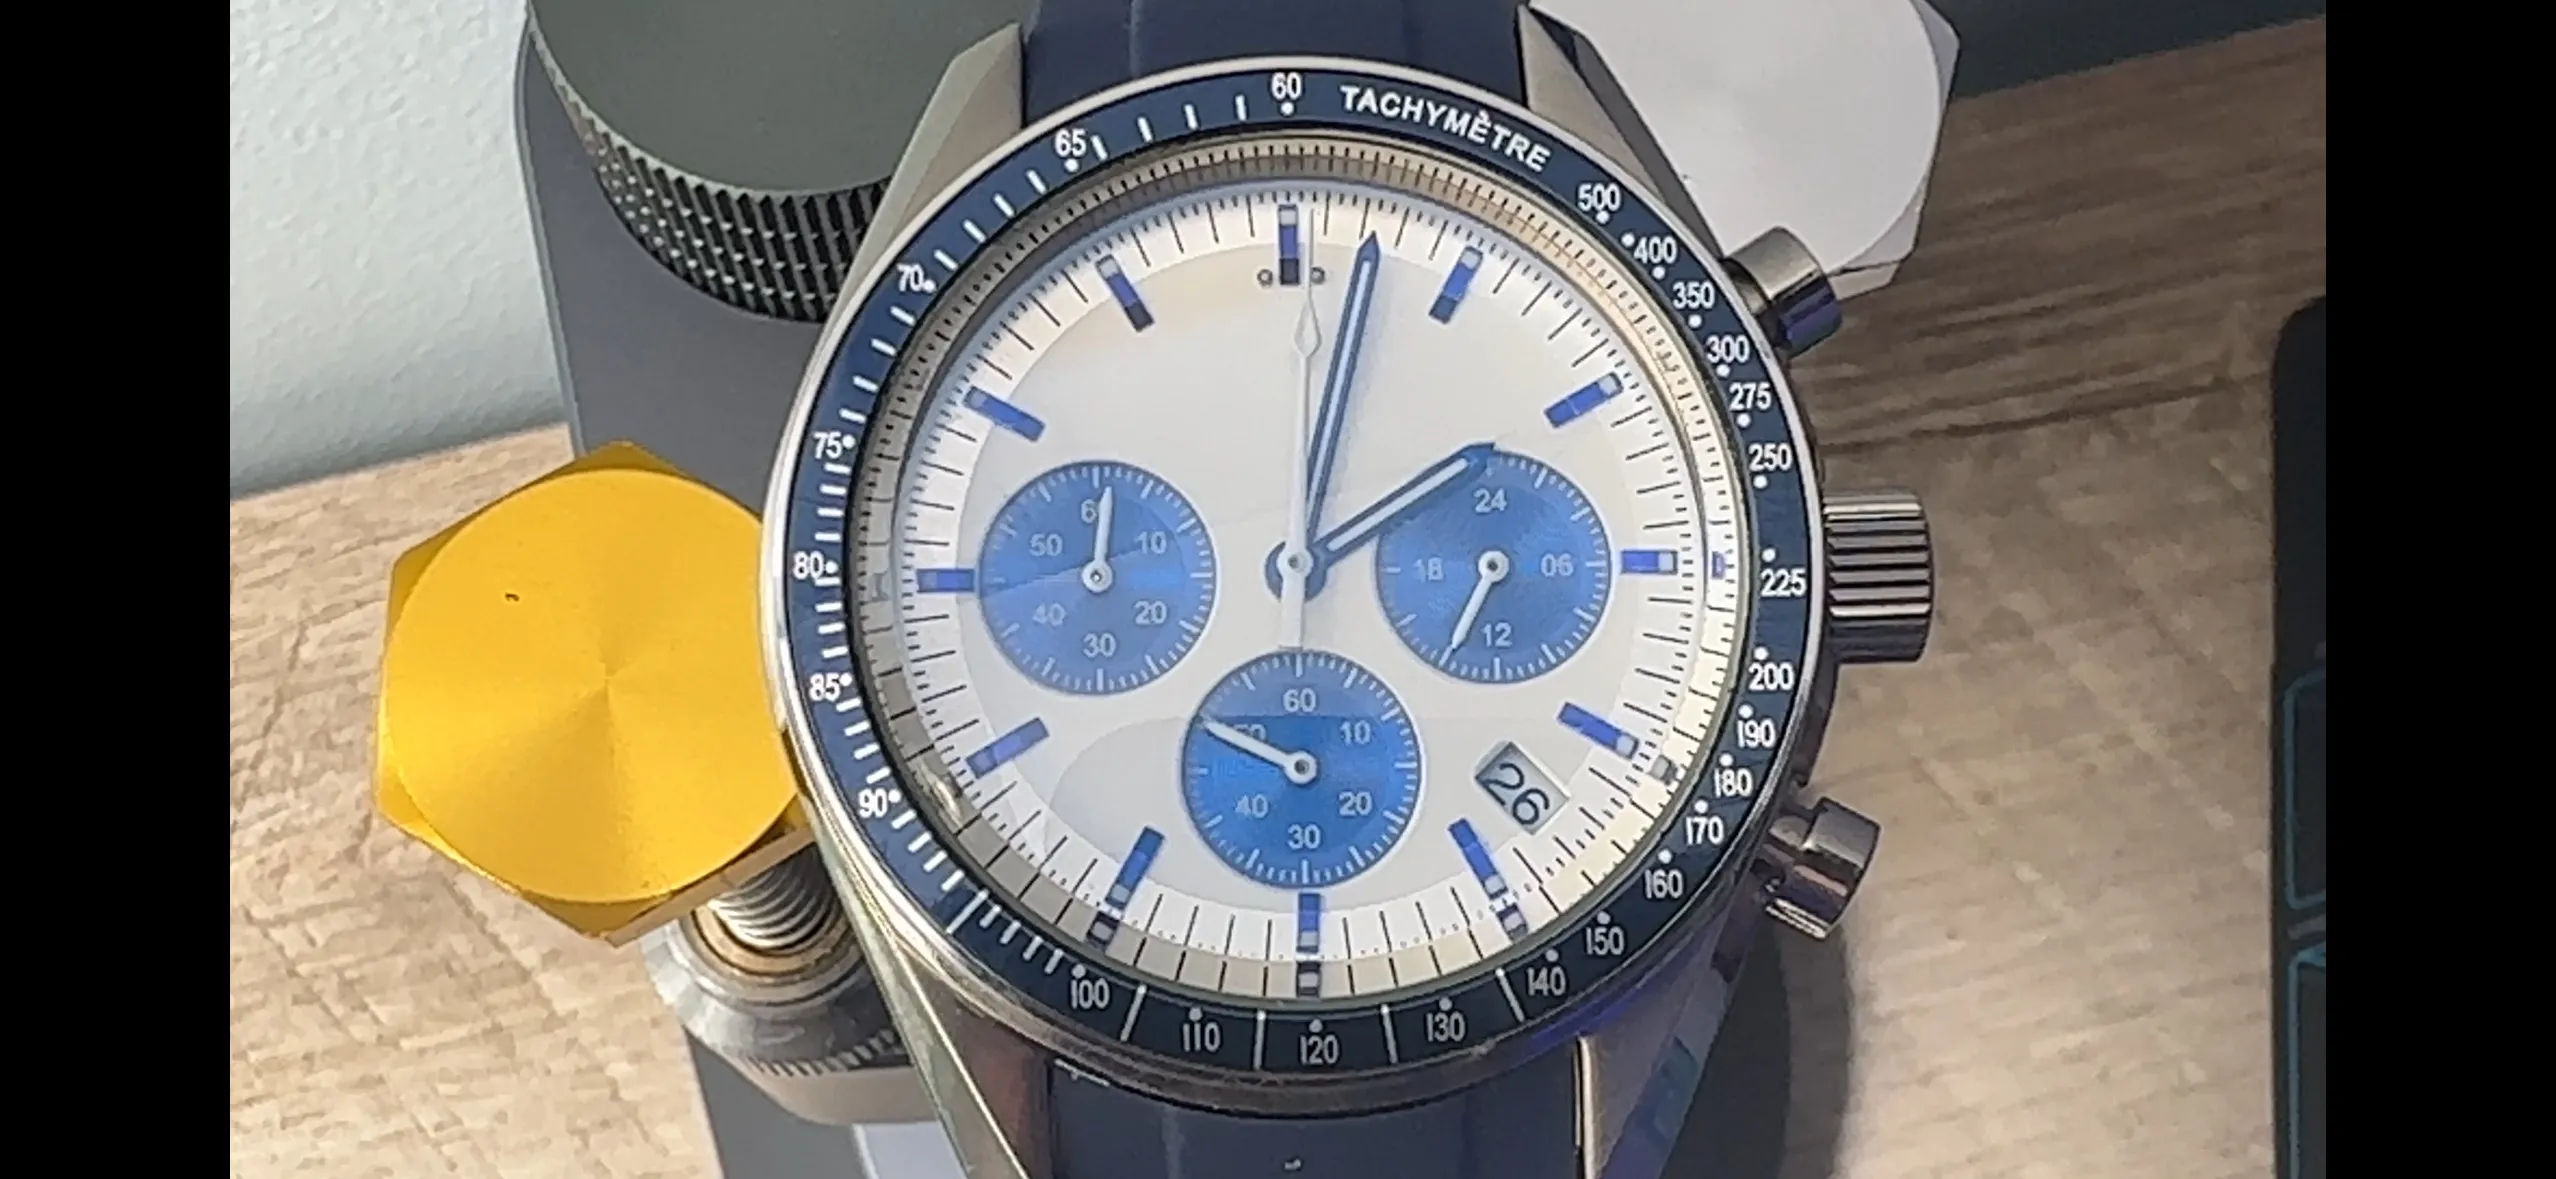
This build uses a Seiko VK63 meca-quartz movement: battery-powered timekeeping with a mechanical-feeling chronograph. Match the case, dial and hand set to the VK63 before ordering. The video shows one blue-and-white combination, but the assembly sequence applies to other compatible VK63 parts.
Set out the tiny subdial hands in a shallow tray and work over a clean, bright surface. A hand that flies off the bench is difficult to find. Before closing the case, check that every hand clears its neighbours and that the chronograph starts, stops and resets.
Opening and assembling a case does not establish water resistance. The caseback gasket needs to be seated correctly, and the finished watch needs a pressure test before you rely on any water-resistance claim.
Install the battery and reset the movement
Fit the battery under the VK63 retaining clip. After installation, perform the movement’s AC reset using the reset contact indicated on your movement and its documentation. The video shows the contact being briefly bridged to the metal movement plate with tweezers. Do not touch other contacts at random. Confirm that the movement runs before fitting the dial.
Battery and AC reset0:37Fit a temporary stem and seat the dial
Thread the supplied stem into the crown temporarily and insert it into the movement so you can set the hands. Advance the movement to the date change and stop at midnight; this gives you a reference for fitting the hour and minute hands.
Align the dial feet with the VK63’s dial-foot holes, around the 11 and 4 o’clock positions on the movement shown in the video. Press the dial down evenly and check that it sits flat, without forcing a misaligned foot.
Temporary crown stem1:35Seating the dial2:28Fit and check the timekeeping hands
With the movement at midnight, pick up the hour hand with a small point of Rodico, line it up at twelve and press it squarely onto its post with a suitable hand pusher. Advance the time through a full cycle to check that it clears the dial and arrives near the date change.
Return to midnight and fit the minute hand at twelve. Turn the crown through another full cycle, checking that the two hands do not touch and that the date changes close to midnight. The video checks this after each hand instead of waiting until the case is closed.
Hour hand3:01Minute hand and clearance check4:41Install the three subdial hands
The 6 o’clock subdial is the running seconds display; fit its tiny hand and rotate the main hands to check clearance. At 9 o’clock is the chronograph’s 60-minute counter. Reset the chronograph before setting that hand to its zero mark, then run it for several minutes and reset it again to verify its return.
The 3 o’clock subdial shows 24-hour time. Set it to agree with the hour selected on the main dial. Work with the smallest appropriate hand-pusher tip and keep spare hands close by if your kit includes them—the video shows just how easily one can spring away.
Identify the subdials6:11Fit the running seconds hand6:47Fit and test the chronograph minute counter8:03Fit the 24-hour hand9:36Set the central chronograph hand
Start, stop and reset the chronograph so the central chronograph post is at its zero position. Press the long central hand on pointing at twelve. Check that it clears the other hands, then run, stop and reset the chronograph to confirm it returns to twelve. If it is off-centre, correct it before casing the movement.
Central chronograph hand10:42Clean and case the movement
Open the screw-down caseback with a rubber ball or suitable caseback tool. Lift the gasket out and set it aside somewhere clean. Remove the temporary stem using the movement’s stem-release point, then blow dust from the dial and the inside of the crystal. Lift stubborn marks with a cleaning pen rather than rubbing the dial.
The case pushers stay in place, so ease the dial and movement into the case at an angle beneath them. Seat the movement holder and check that the dial is level and free of visible debris before proceeding.
Open and prepare the case12:26Final cleaning13:40Case the dial and movement14:15Size and secure the crown stem
Measure the excess stem with calipers while checking how far the crown must travel to seat and screw down. Mark and trim conservatively, then refit the stem and test all crown positions. You can remove a little more metal, but a stem cut too short must be replaced. The video removes about 4 mm for this particular case; measure your own parts rather than copying that figure.
Once the fit is right, remove the stem again and put a tiny amount of medium strength thread locker on the crown thread. Reassemble, wipe away excess and allow it to cure according to the product instructions. Test the crown and both chronograph pushers again.
Measure and trim the stem15:00Secure the crown thread16:25Close the case, align the bezel and attach the strap
Lightly grease the caseback gasket and return it to its channel without a twist or pinch. Start the caseback threads by hand, then tighten with the rubber ball or appropriate tool. This is a seal assembly step, not a substitute for a pressure test.
Dry-fit the dark-blue tachymetre insert first. Once the alignment is clear, remove its adhesive backing and place it with the 60 mark at twelve; the video notes that the adhesive gives little room for repositioning. Finally, feed the spring bars through the blue rubber strap and use a spring-bar tool to seat both ends securely in the lugs. Tug each strap end gently to confirm it is locked.
Gasket and caseback17:15Align the adhesive bezel insert17:55Fit the rubber strap19:03The video walkthrough
Stuck partway through, or would rather have it done for you? Get in touch.